
support.getchaired.com > Host Listing Setup
Host LIsting Setup
Let’s get you ready to become a Host!
Follow the step-by-step guide below to create your first Host listing. Or check out this Host Listing Setup video showing an example of the entire listing creation process.
Step 1 - Add SAlon
Go to www.getchaired.com
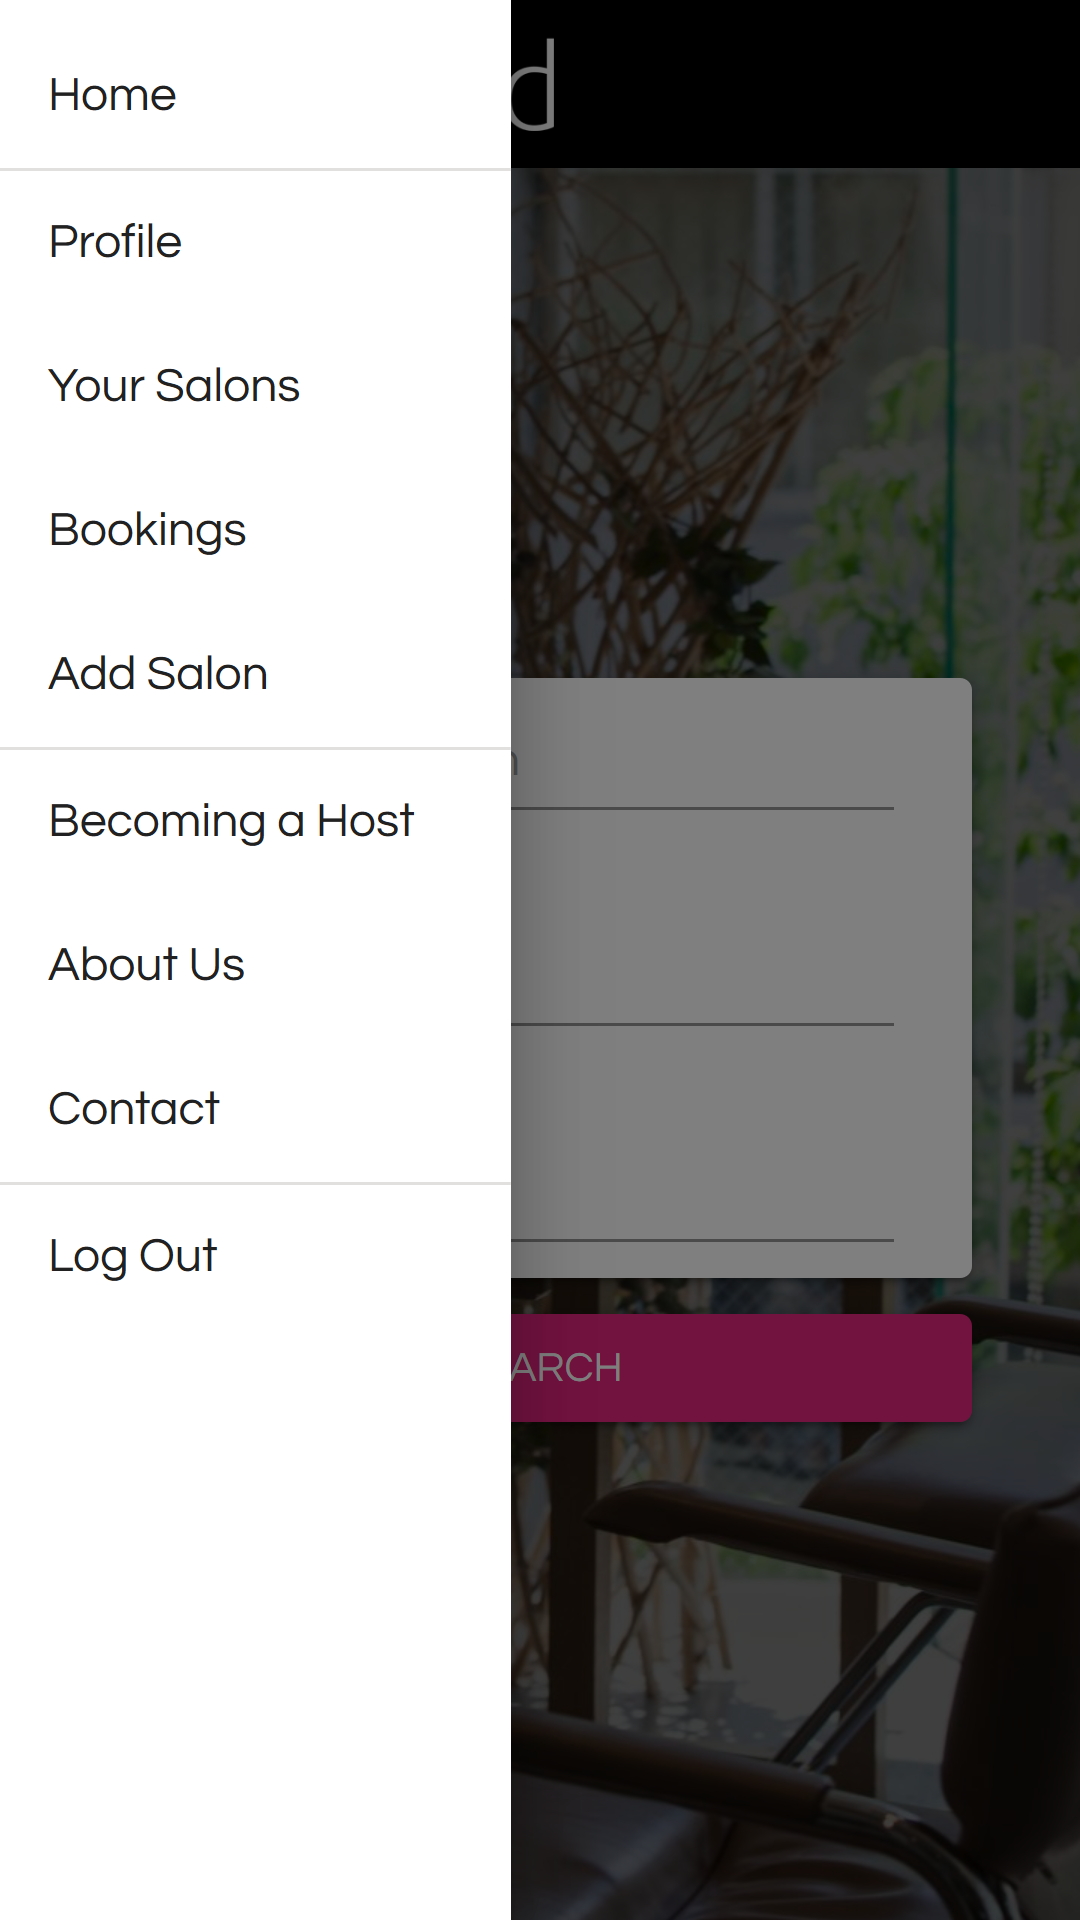
Click the hamburger menu on the top left of your screen.
Click “Add Salon”
Step 2 - Basic Salon Information
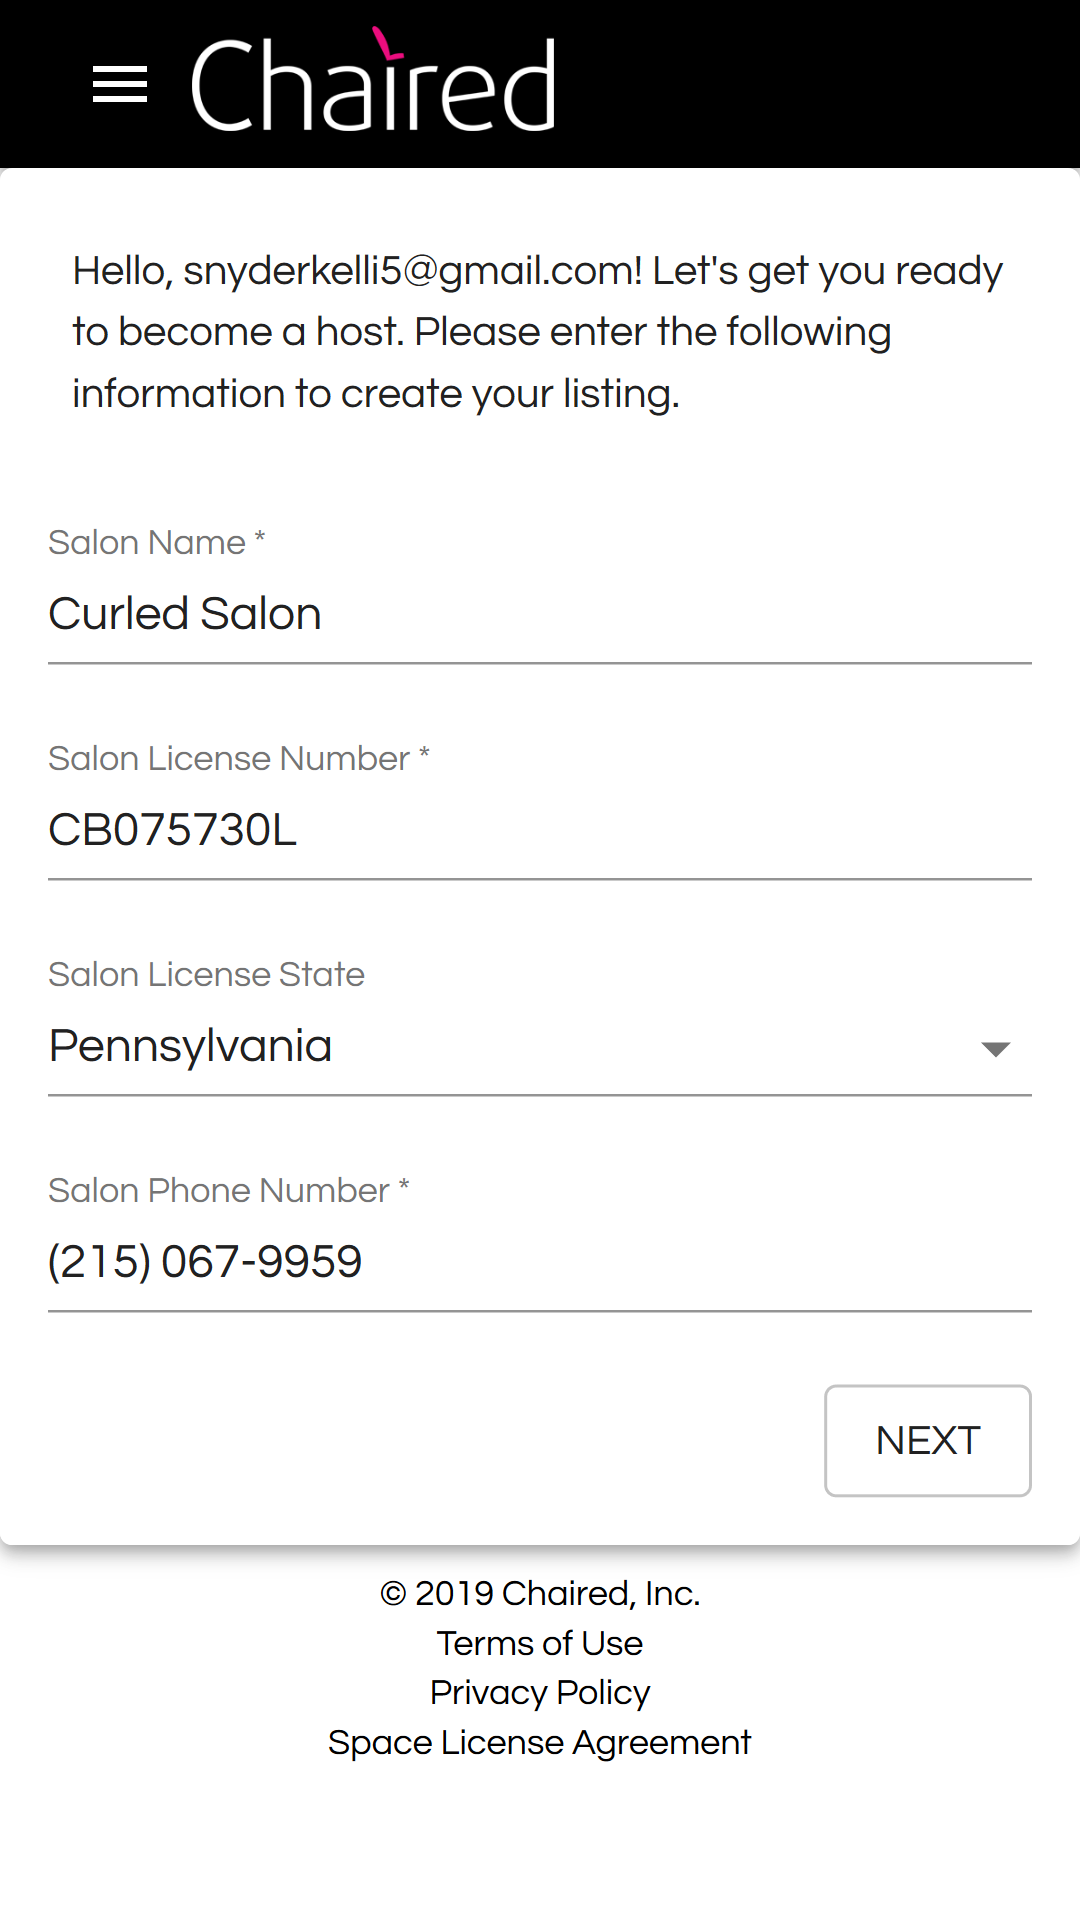
Begin entering your information in the blank fields. All information will appear on your listing exactly how you enter it in the fields so be careful to include the formatting you wish to be presented.
We ask for your salon license number to help Hosts and Guests stay in compliance with applicable regulations.
Remember that your information will appear on your listing exactly how you enter the information. We suggest you add brackets “( )” and dashes “-” to your phone number as illustrated in this example picture.
Step 3 - Salon Address
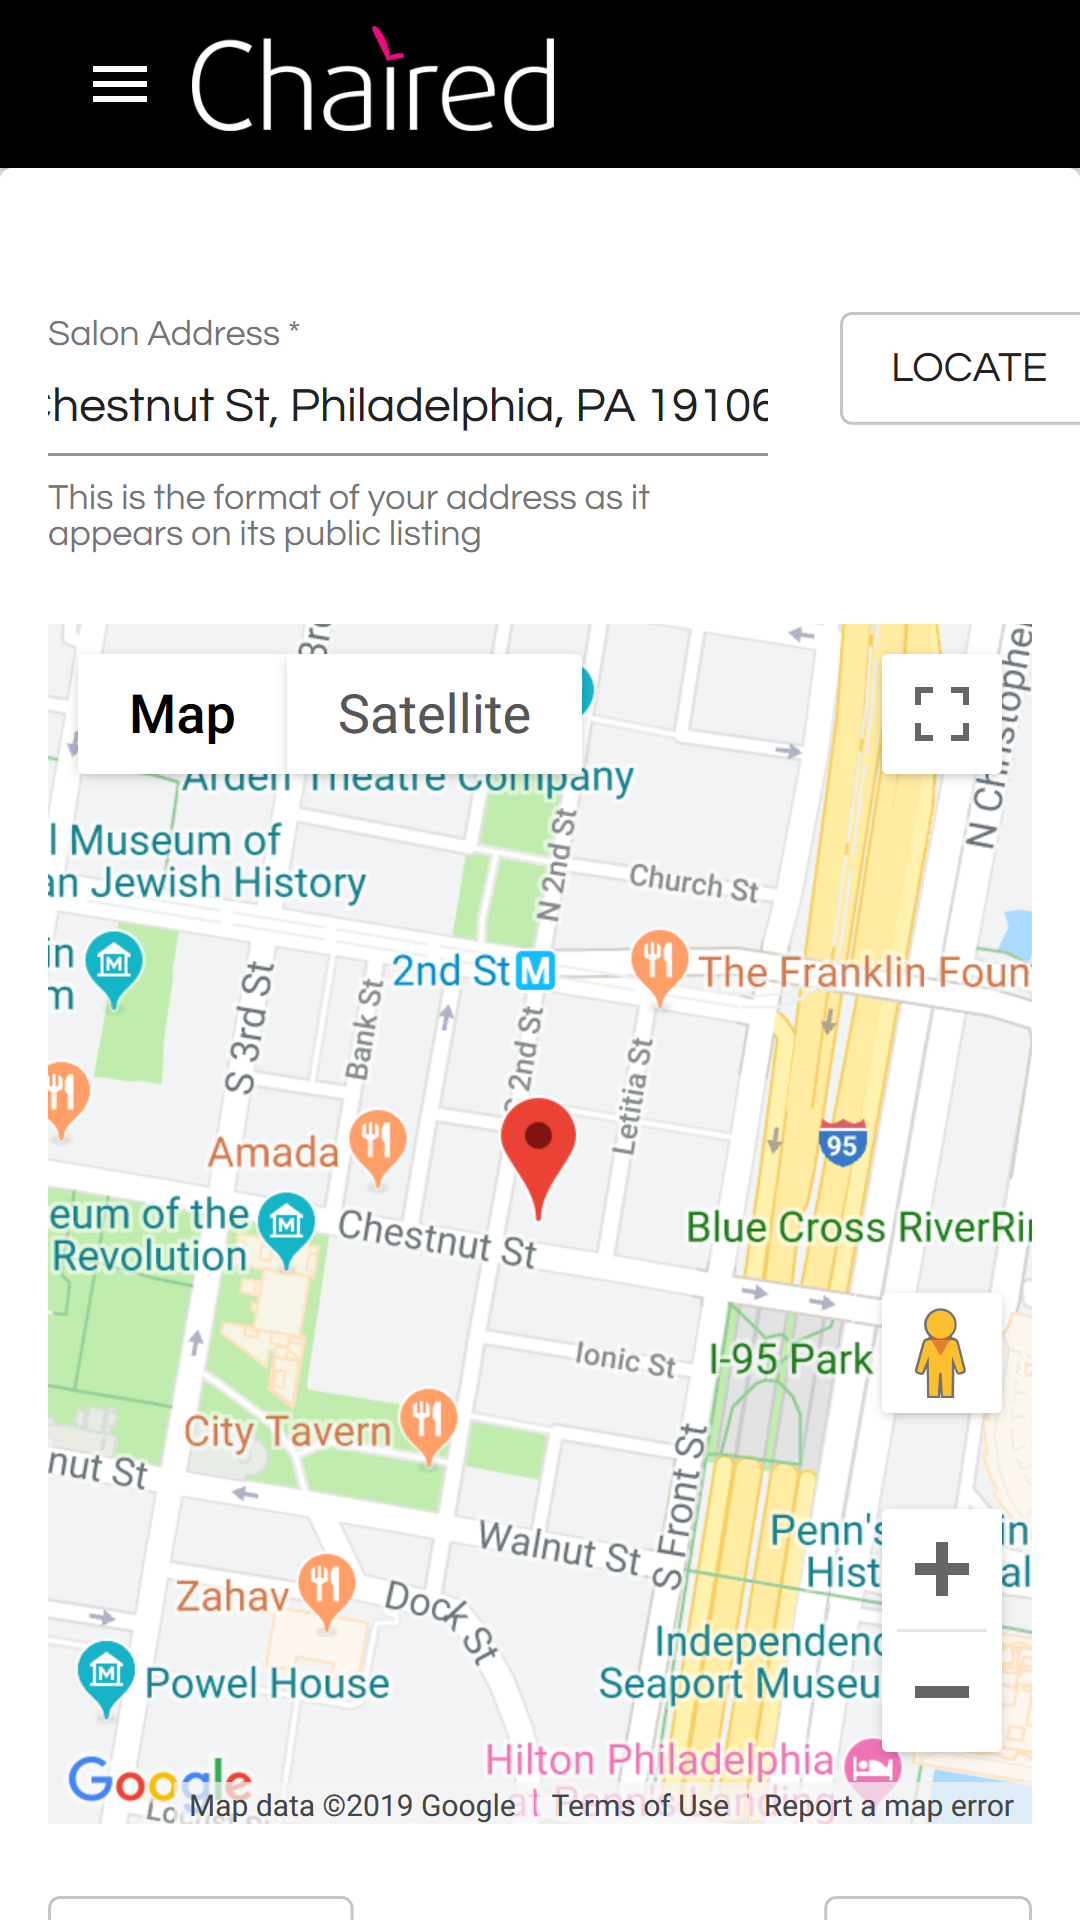
Enter the address of your salon then click “Locate”
The map will drop a pin on your entered address.
To adjust the pin location you must modify the address information entered in the address field.
Step 4 - Listing Title and Description
Now its time to get creative and really sell your listing!
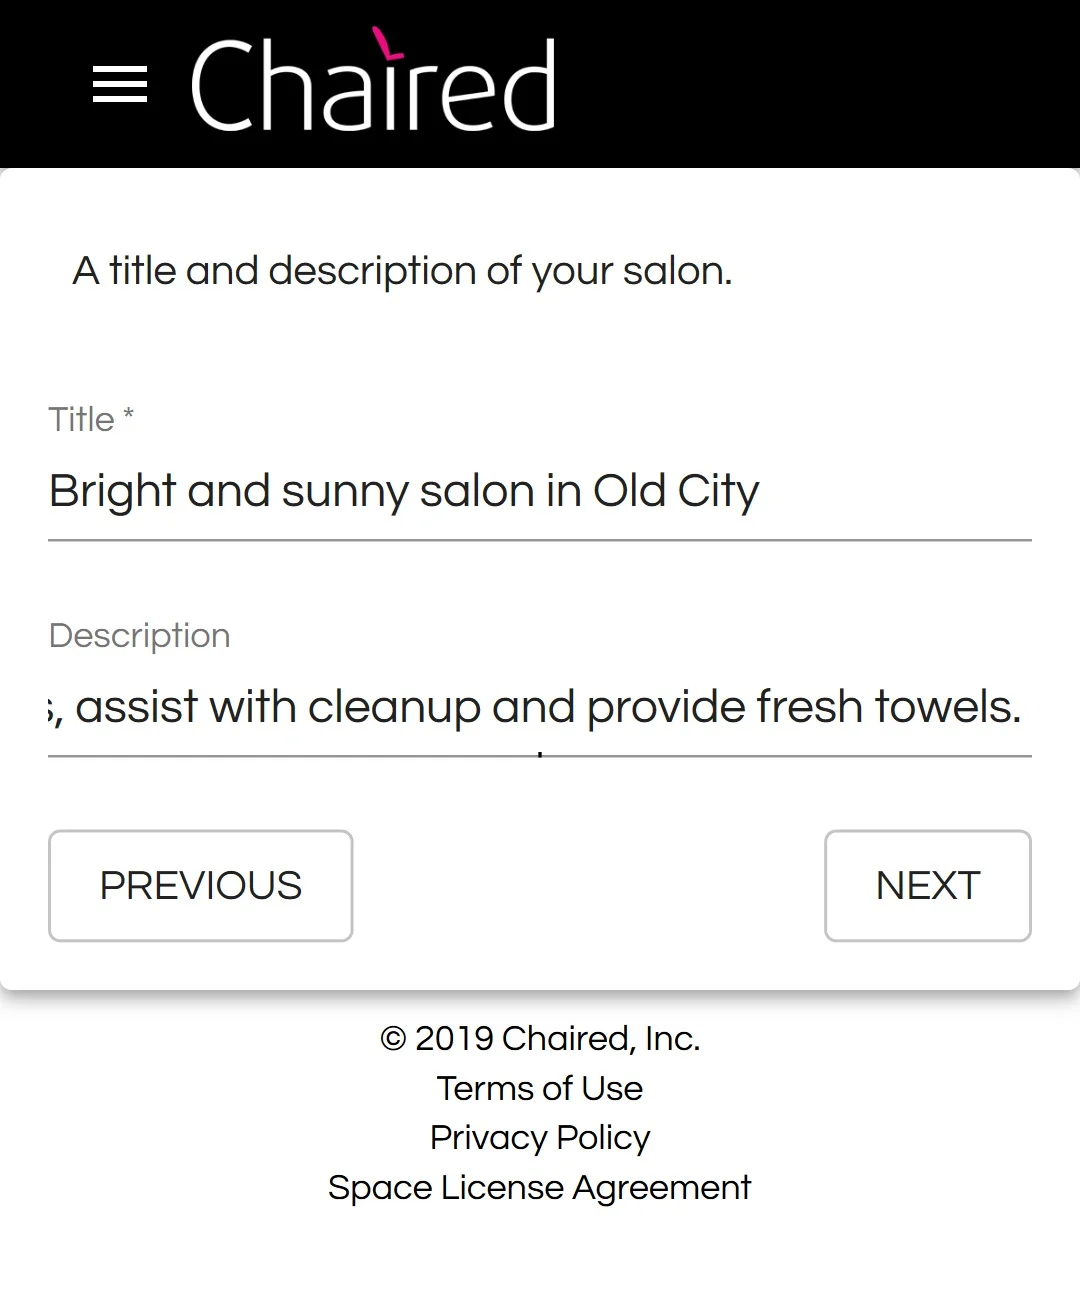
Start by dreaming up a fun, inviting title that really captures the essence of your salon. Make sure it’s descriptive and accurate so Guests aren’t confused.
In a short paragraph, describe your salon and the workstation you’re listing for rent. The Description field is an opportunity to describe attributes not included elsewhere in the Listing, such as:
Aesthetics of the salon space, for example: modern, chic, traditional, vintage, etc.
Details of the overall salon, such as # of chairs or workstations, # hairwash stations, receptionist services and assistants.
Proximity to transportation, public parking and retail center parking.
Characteristics of foot or car traffic on the street - if it’s a busy street with lots of walk-in clients mention this!
Specific rules you require Guests obey.
Anything about other stylists that work in the space - what is the culture and vibe in the salon?
Later in the listing setup you will be asked to select which standard amenities, services and equipment that your listing provides to Guests. If you provide unusual and unique amenities or services you can mention those here.
Anything else unique about your salon!
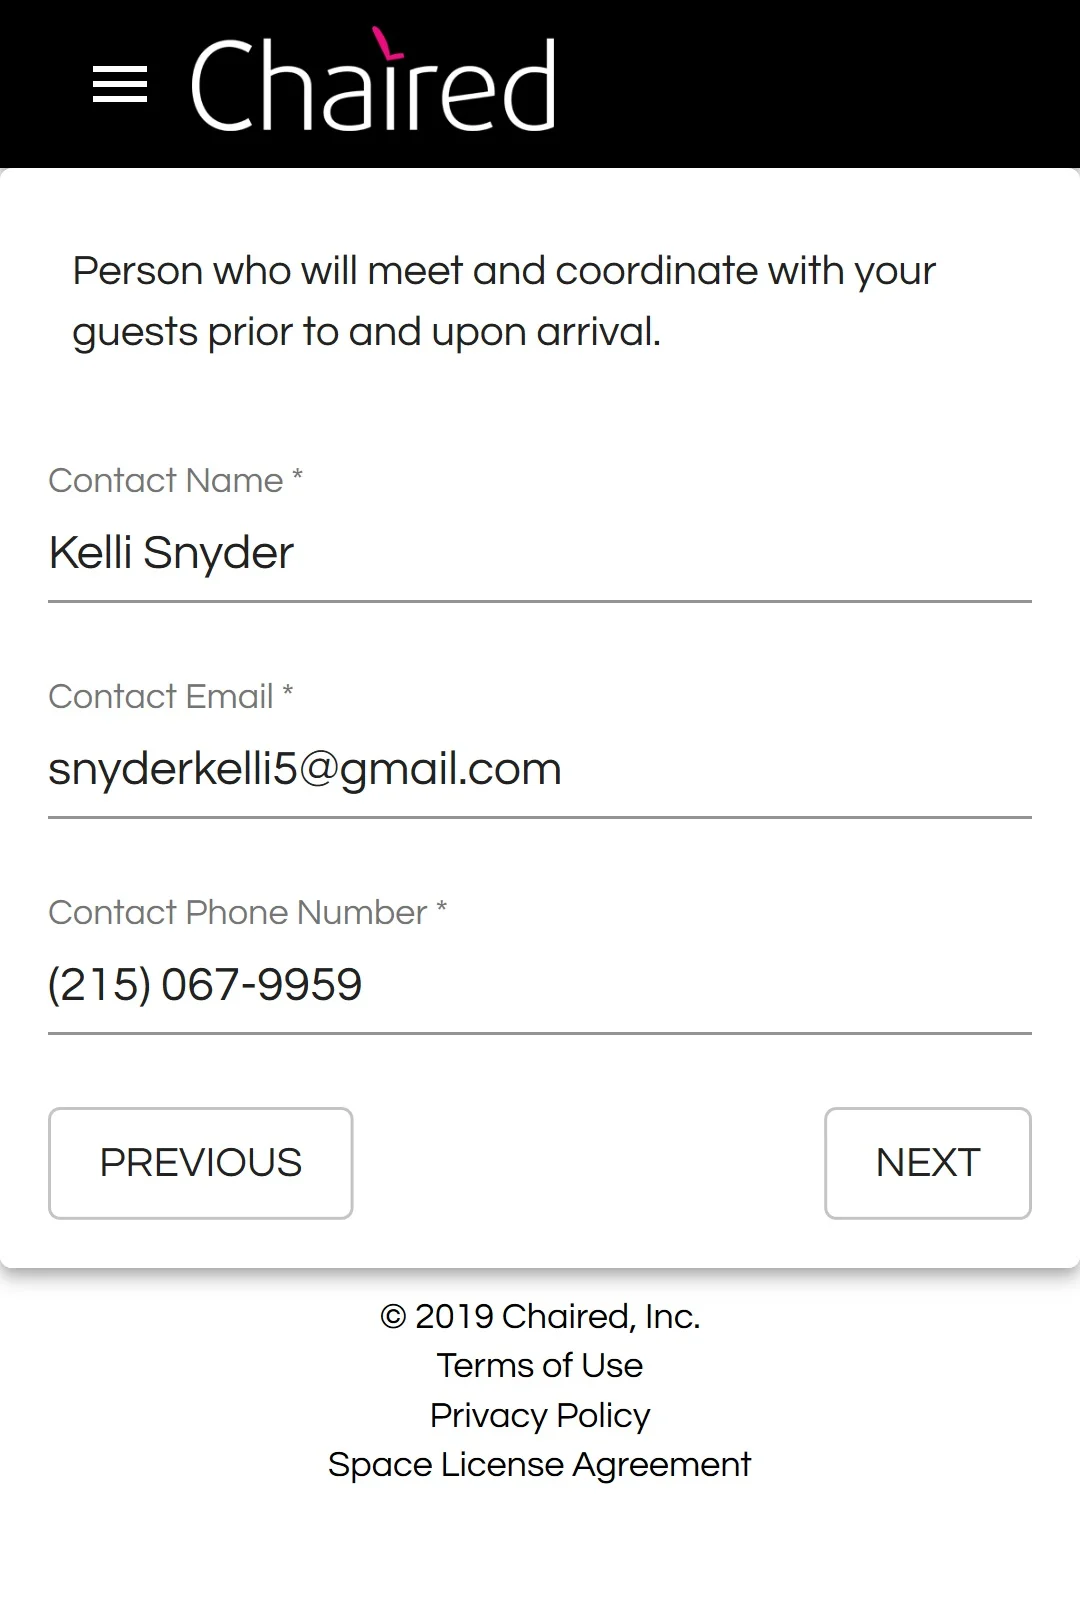
Step 5 - Arrival Contact Person
Who will be at the salon to welcome your Guest and show them to their workstation? If you’re the contact person at arrival enter your information here. If someone else will serve this role you should enter their information here.
This contact information will be shared with your Guests upon confirmation of a booking so they may ask any questions ahead of their booking date.
Step 6 - Salon Listing Images
A picture is worth a thousand words! This step allows you to upload pictures of your salon. It’s important to take and upload beautiful, professional pictures with flattering lighting. Typically, if you use professionally shot photos you’ll be able to charge more and enjoy greater booking demand.
The order of your image upload matters - the first picture you upload (“Image 0”) will be used as your primary listing photo.
We suggest you upload multiple pictures:
Chaired is working on a feature to allow your listings to display multiple pictures. Stay tuned!
Chaired may use your uploaded images to directly advertise your listing on Google search, Facebook and other online platforms in order to pull greater booking demand for your salon.

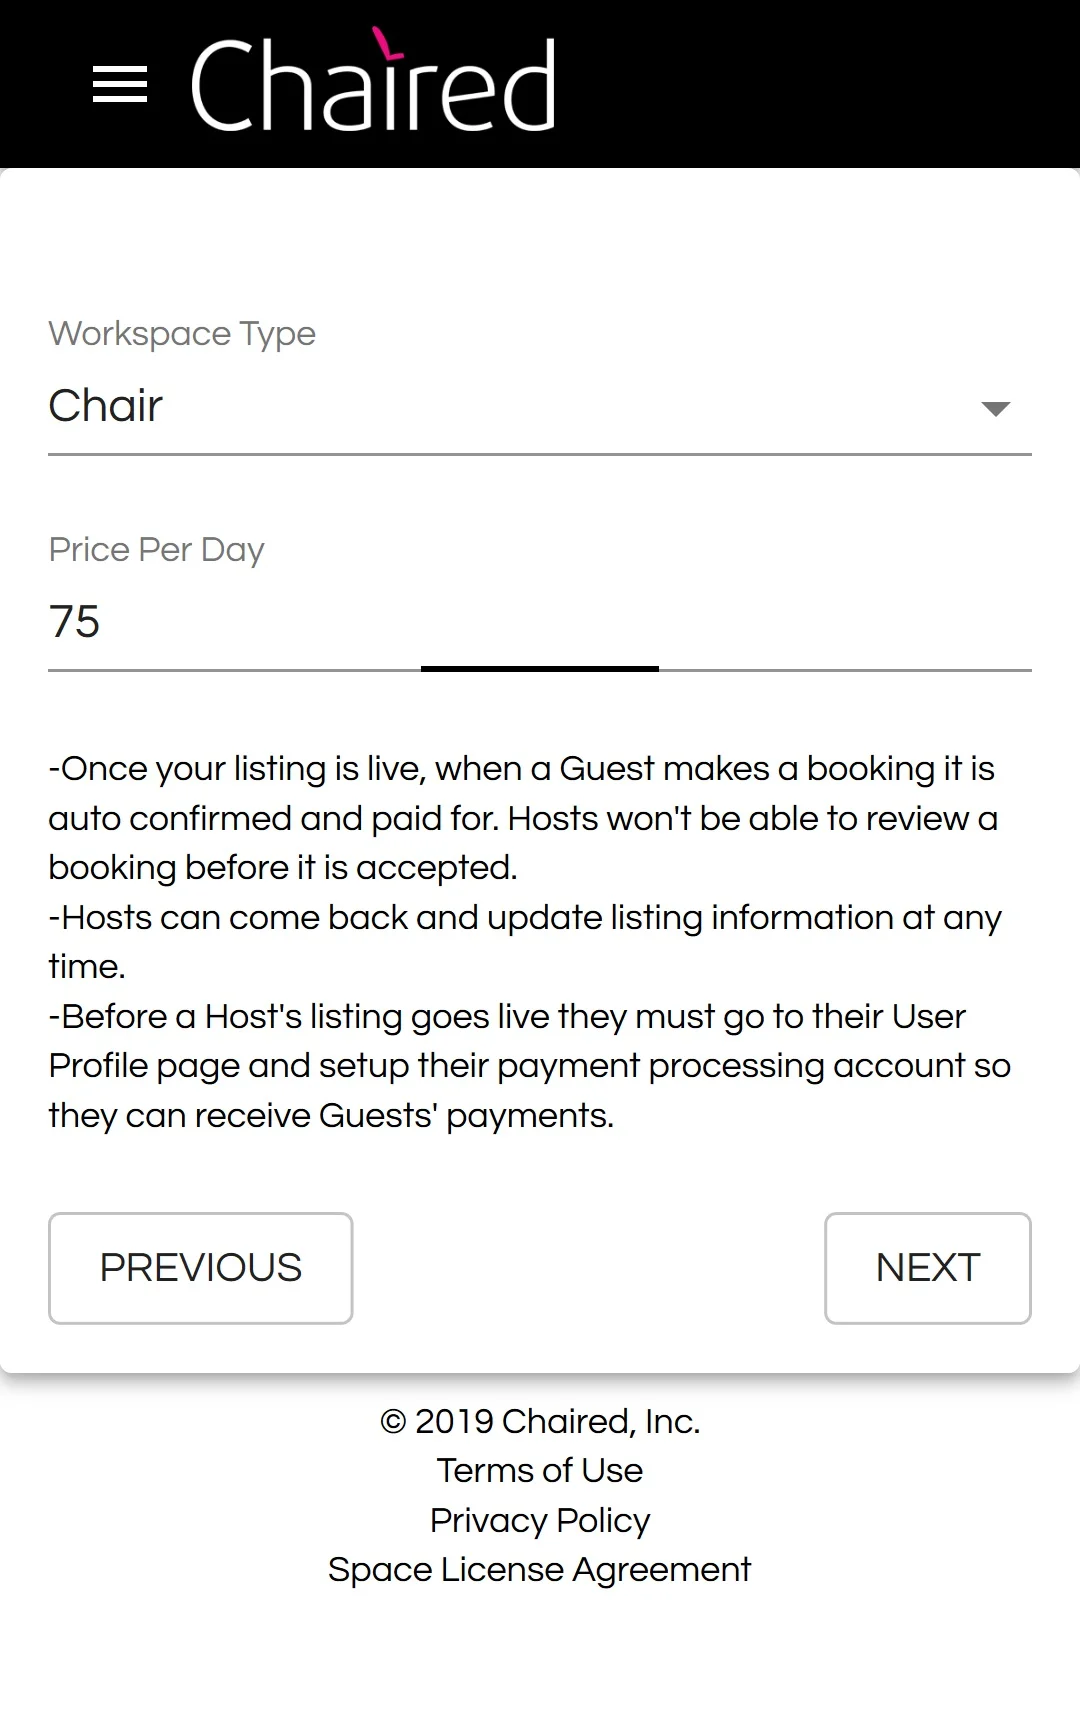
Step 7 - Workstation Type and Price
Chaired allows you to specify the type of work station you are listing - whether your listing is for a Chair in an open salon, a Private Suite or an Event Space in a salon location.
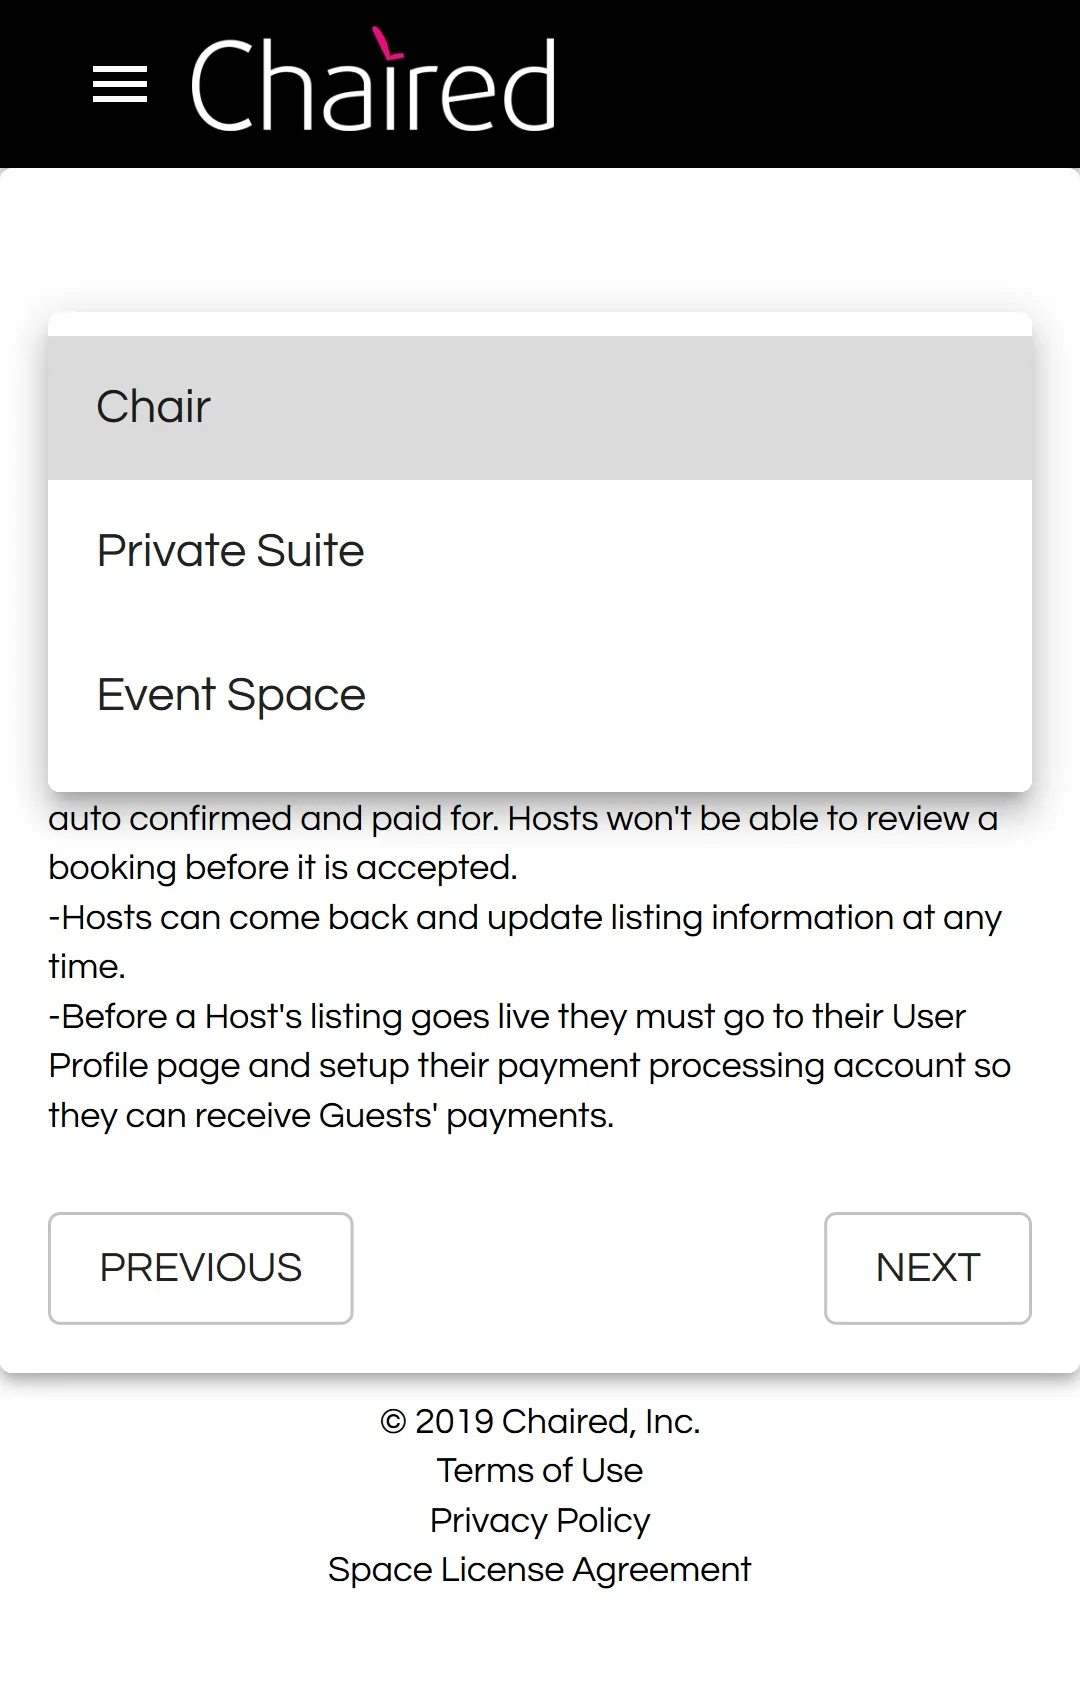
Specify the price per day you wish to charge.
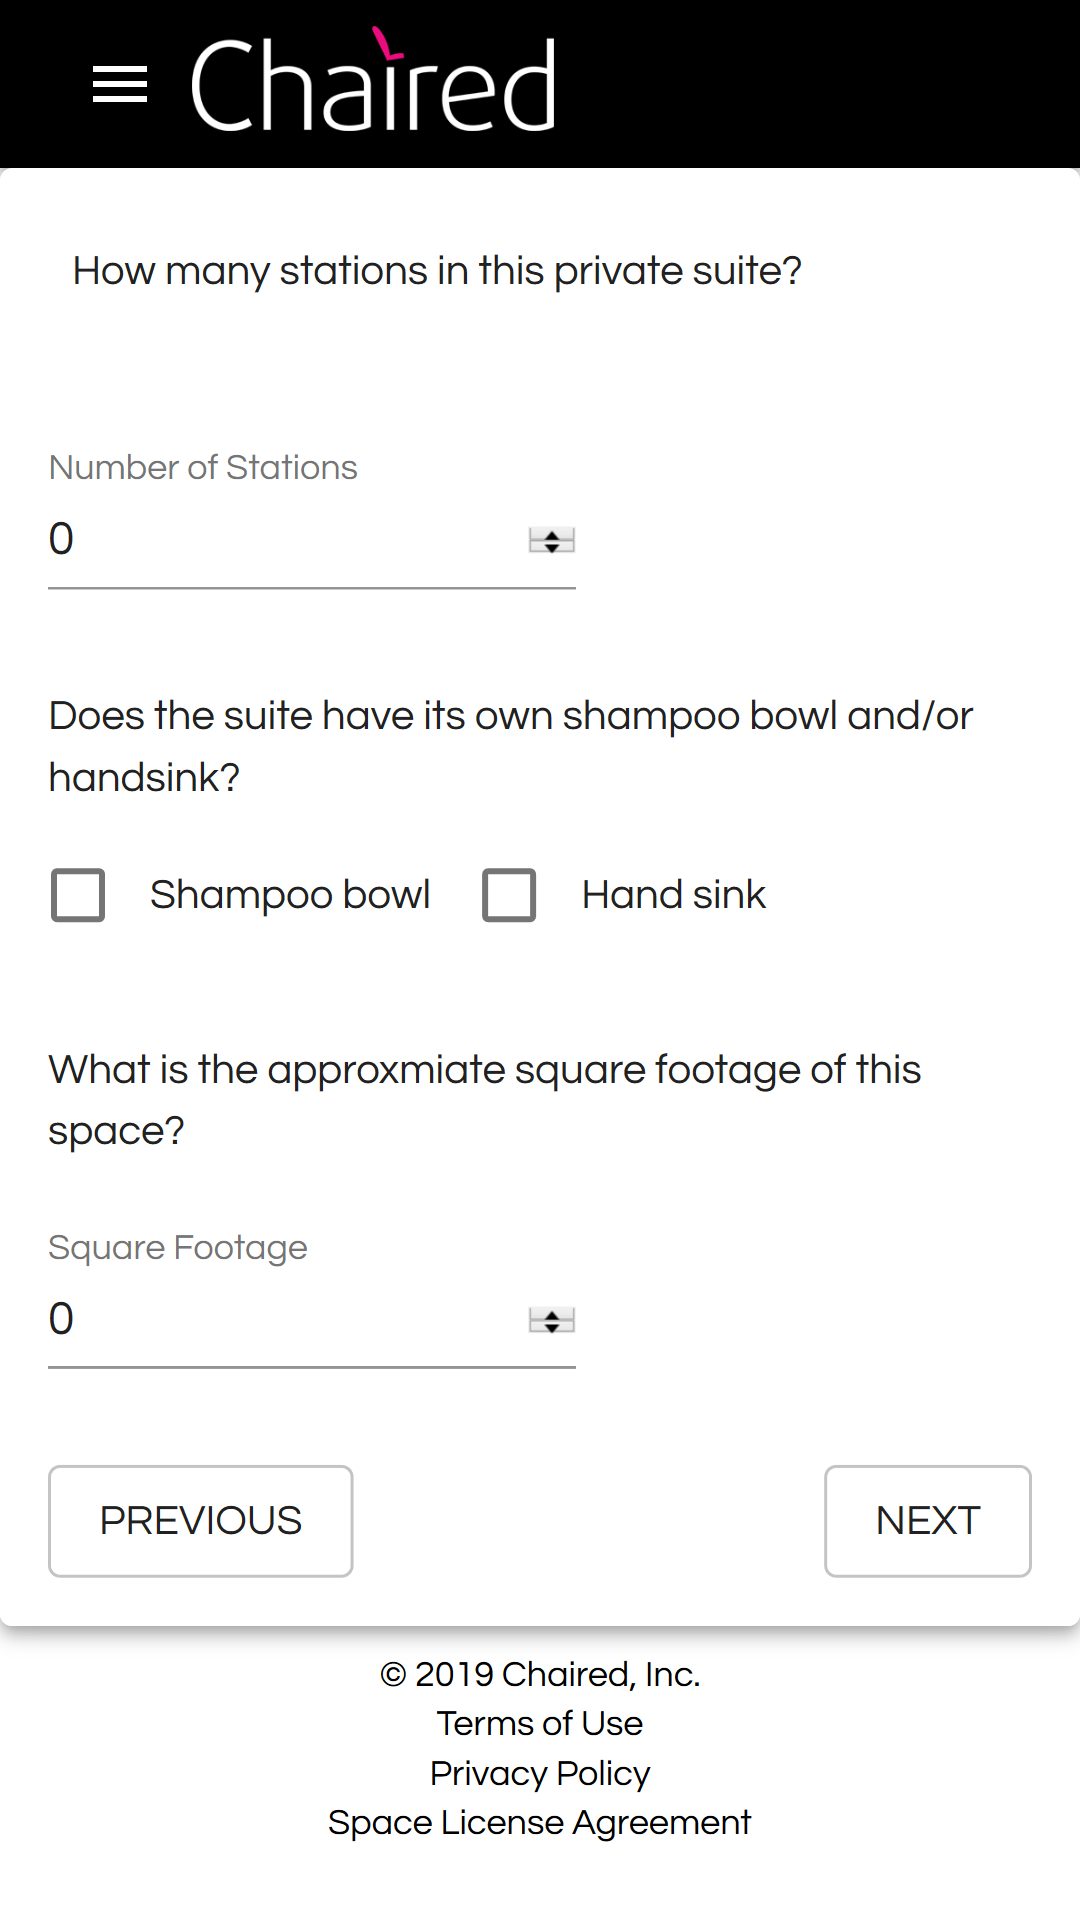
Step 8 - PRivate Suite Additional Details
If you selected Private Suite in the previous step you may further specify the details of your listing. Only include the stations that you are granting use of for the Price Per Day charge entered in the previous step.
If you selected a Chair in the previous step you will skip this and go right to Step 9.
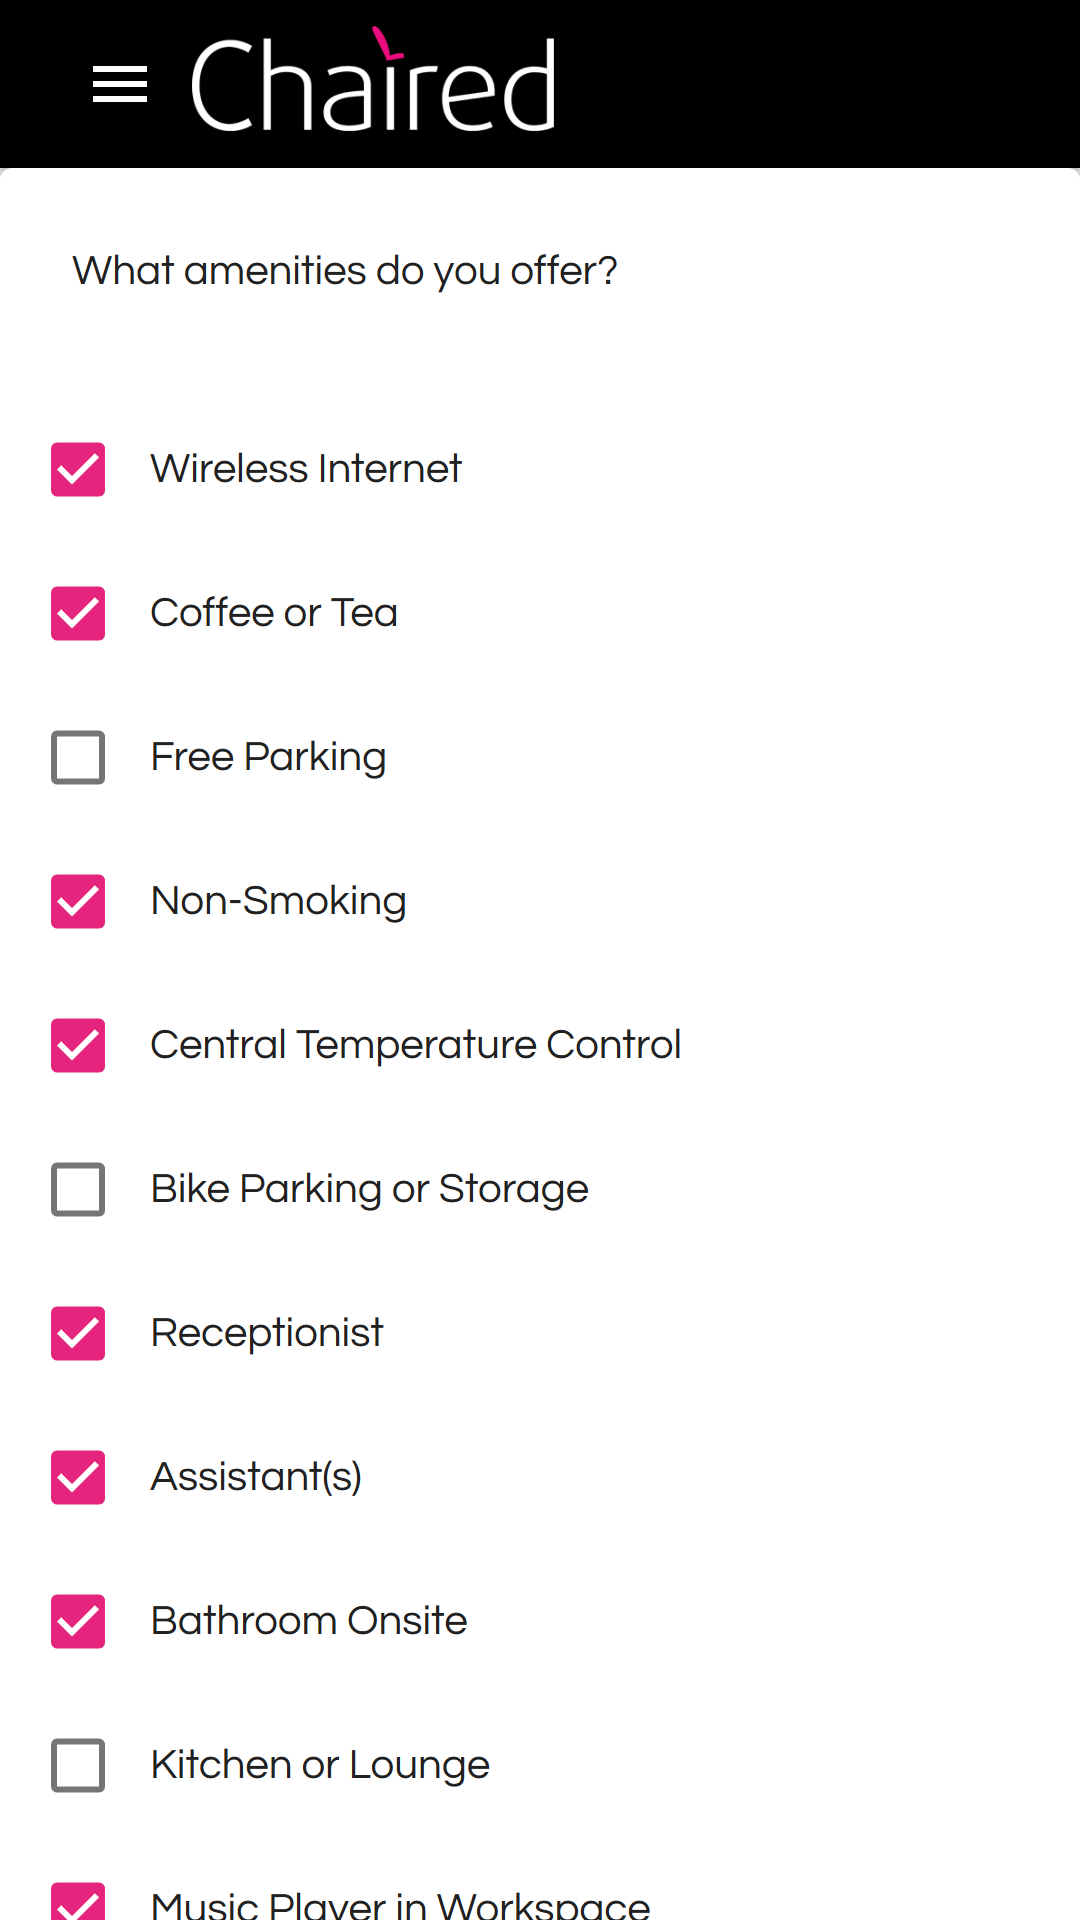
Step 9 - Amenities
Select the amenities that you will offer to your Guests. Typically, if you offer more amenities and services you’ll be able to charge more and enjoy greater booking demand.
To suggest changes to the amenity categories please email us at hello@getchaired.com or fill out the Contact Us form.
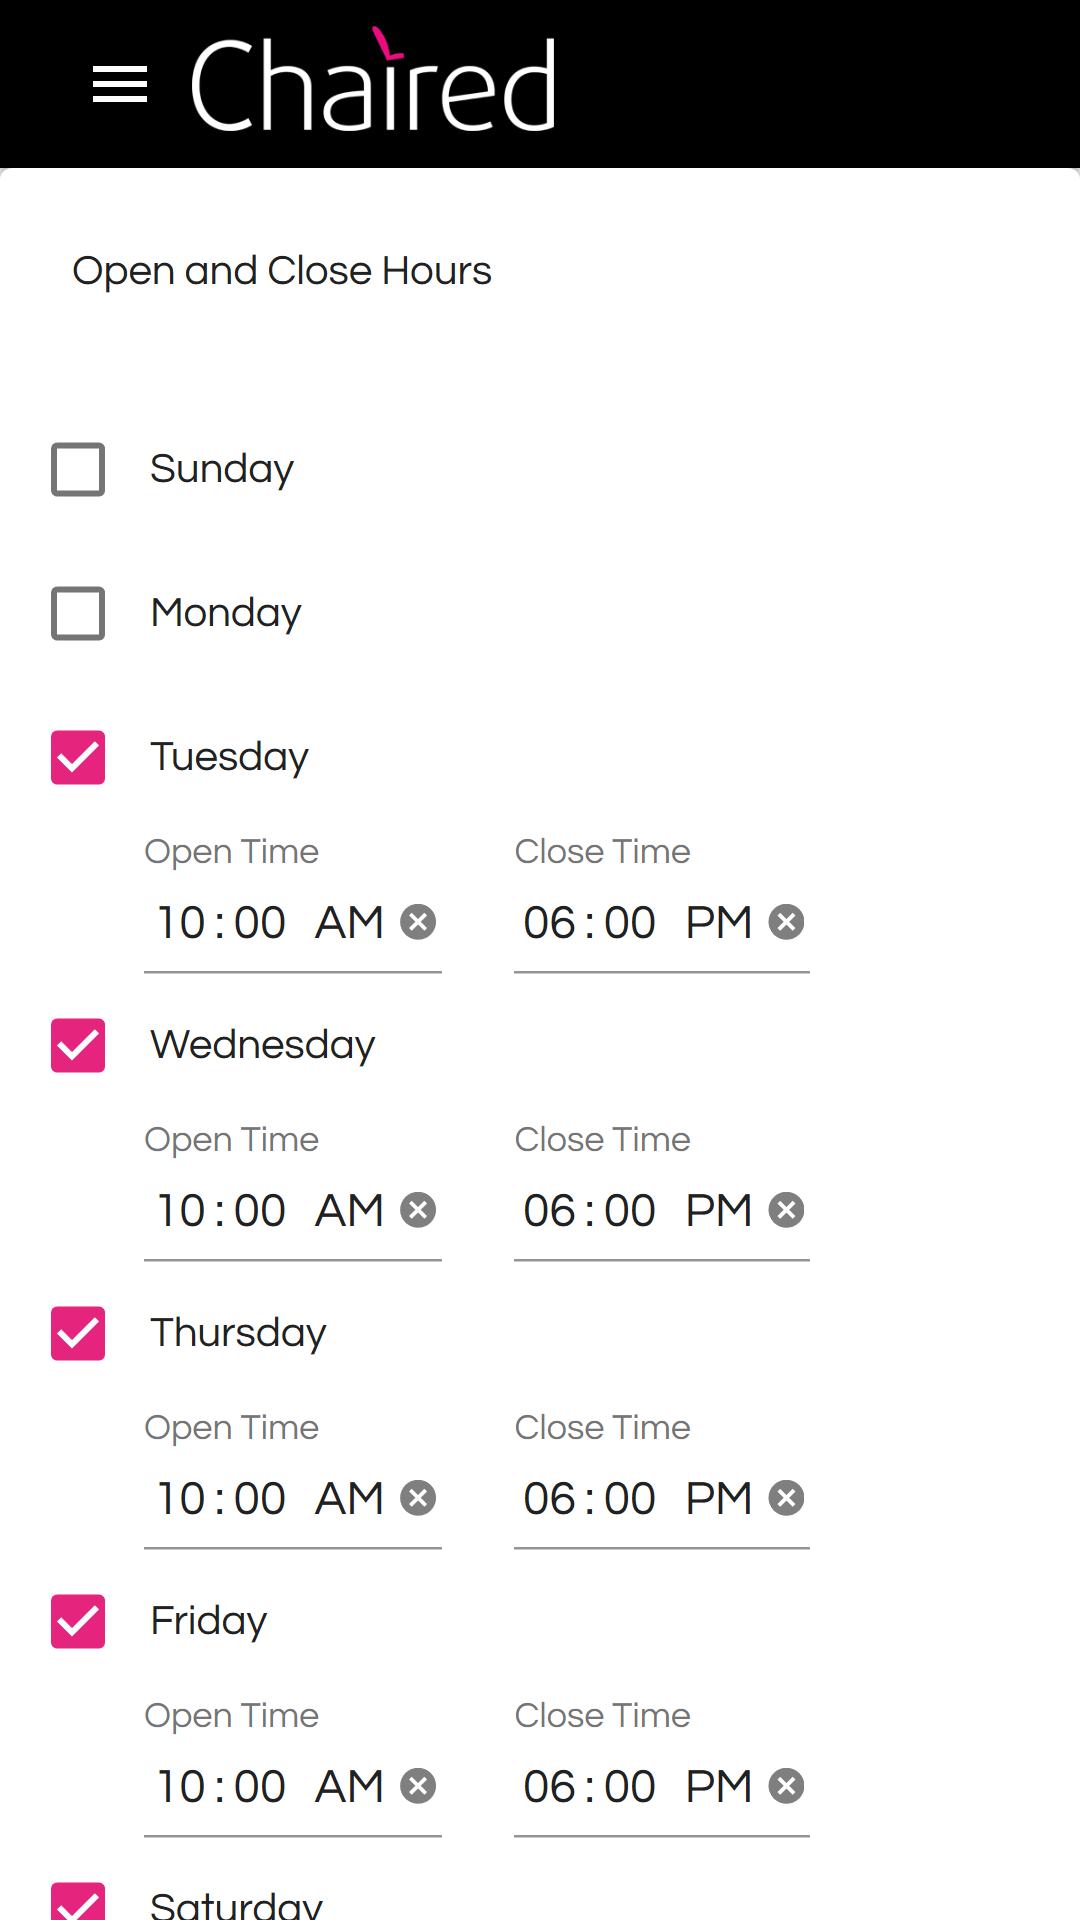
Step 10 - Business Hours
Choose the days of the week and the daily hours your salon listing is open. If you permit Guests to arrive or stay outside of the posted business hours you can inform them by email after they make a booking reservation.
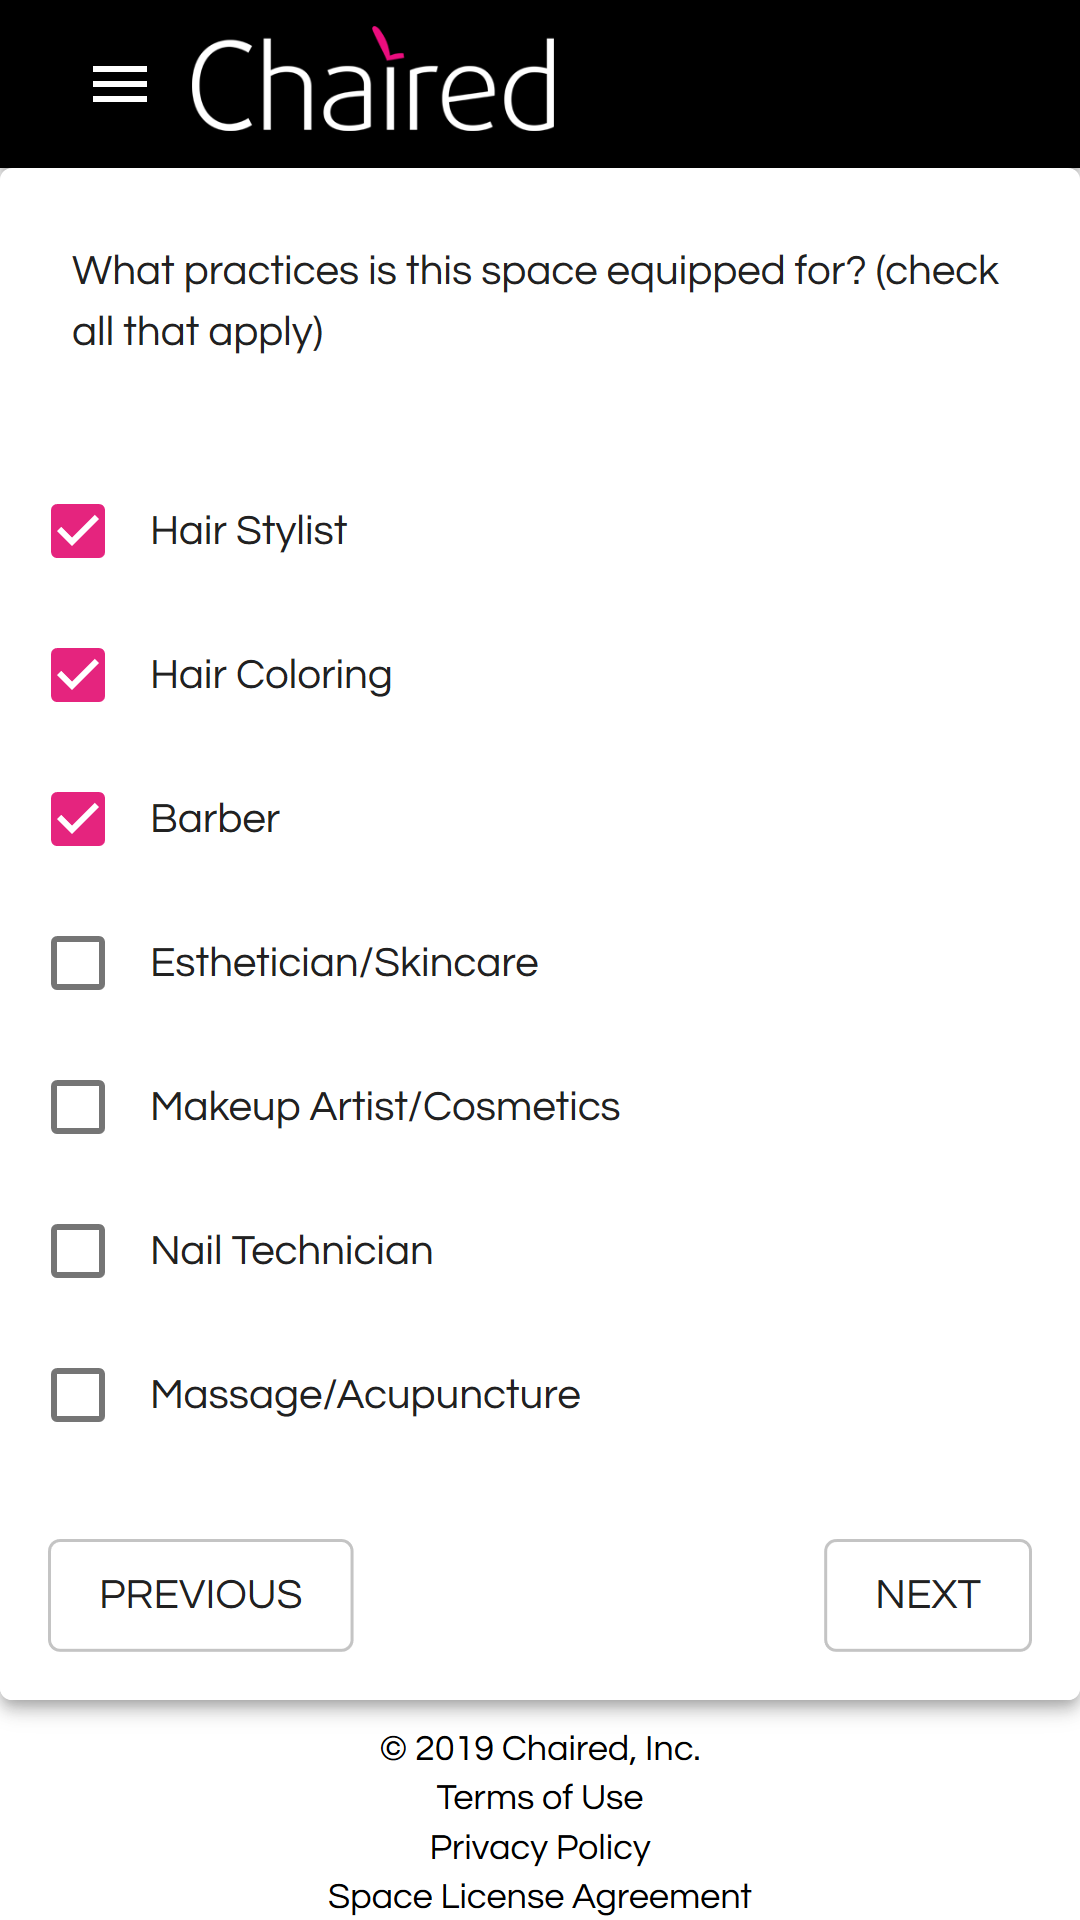
Step 11 - Practice Types
Choose the cosmetology practice types your listing is equipped for.
To suggest changes to the practice type categories please email us at hello@getchaired.com or fill out the Contact Us form.
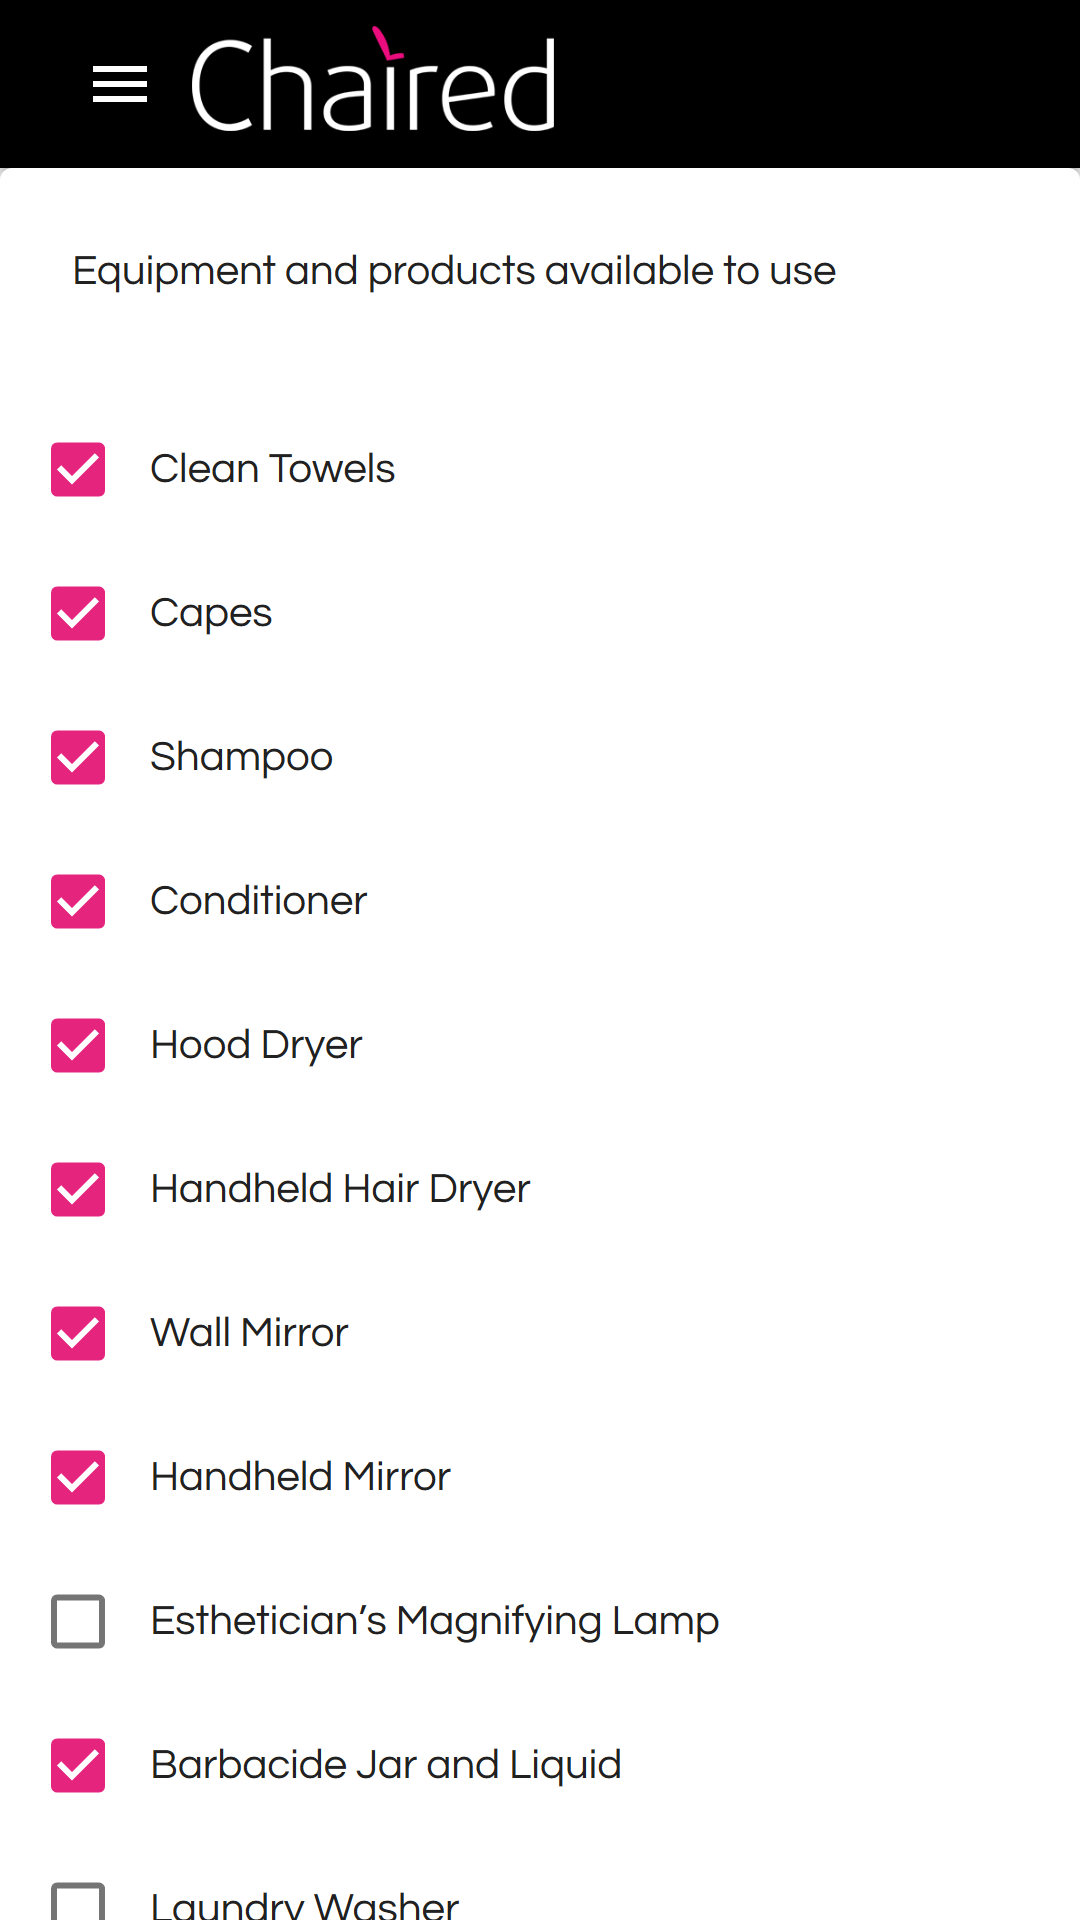
Step 12 - Equipment and Products
Indicate what equipment, products, towels and tools you provide for Guests’ use. Typically, if you offer more equipment and products you’ll make the experience easier for Guests, be able to charge more and enjoy greater booking demand.
To suggest changes to the equipment and product categories please email us at hello@getchaired.com or fill out the Contact Us form.
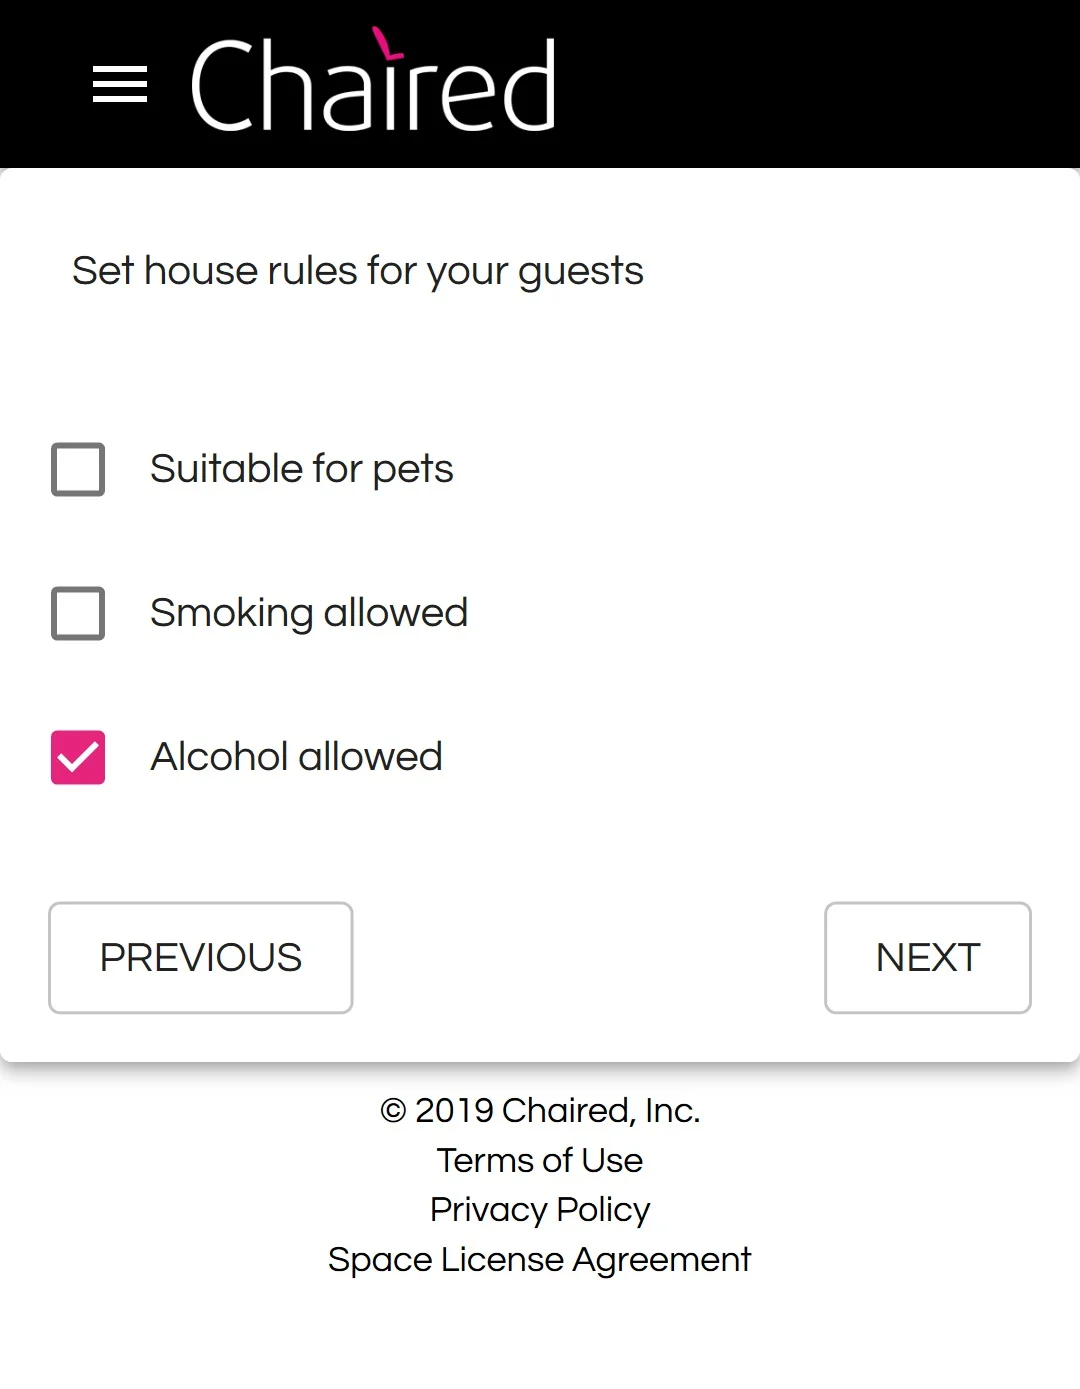
Step 13 - Salon Rules
Select if any of these rules apply to your listing.
To suggest changes to the rules categories please email us at hello@getchaired.com or fill out the Contact Us form.
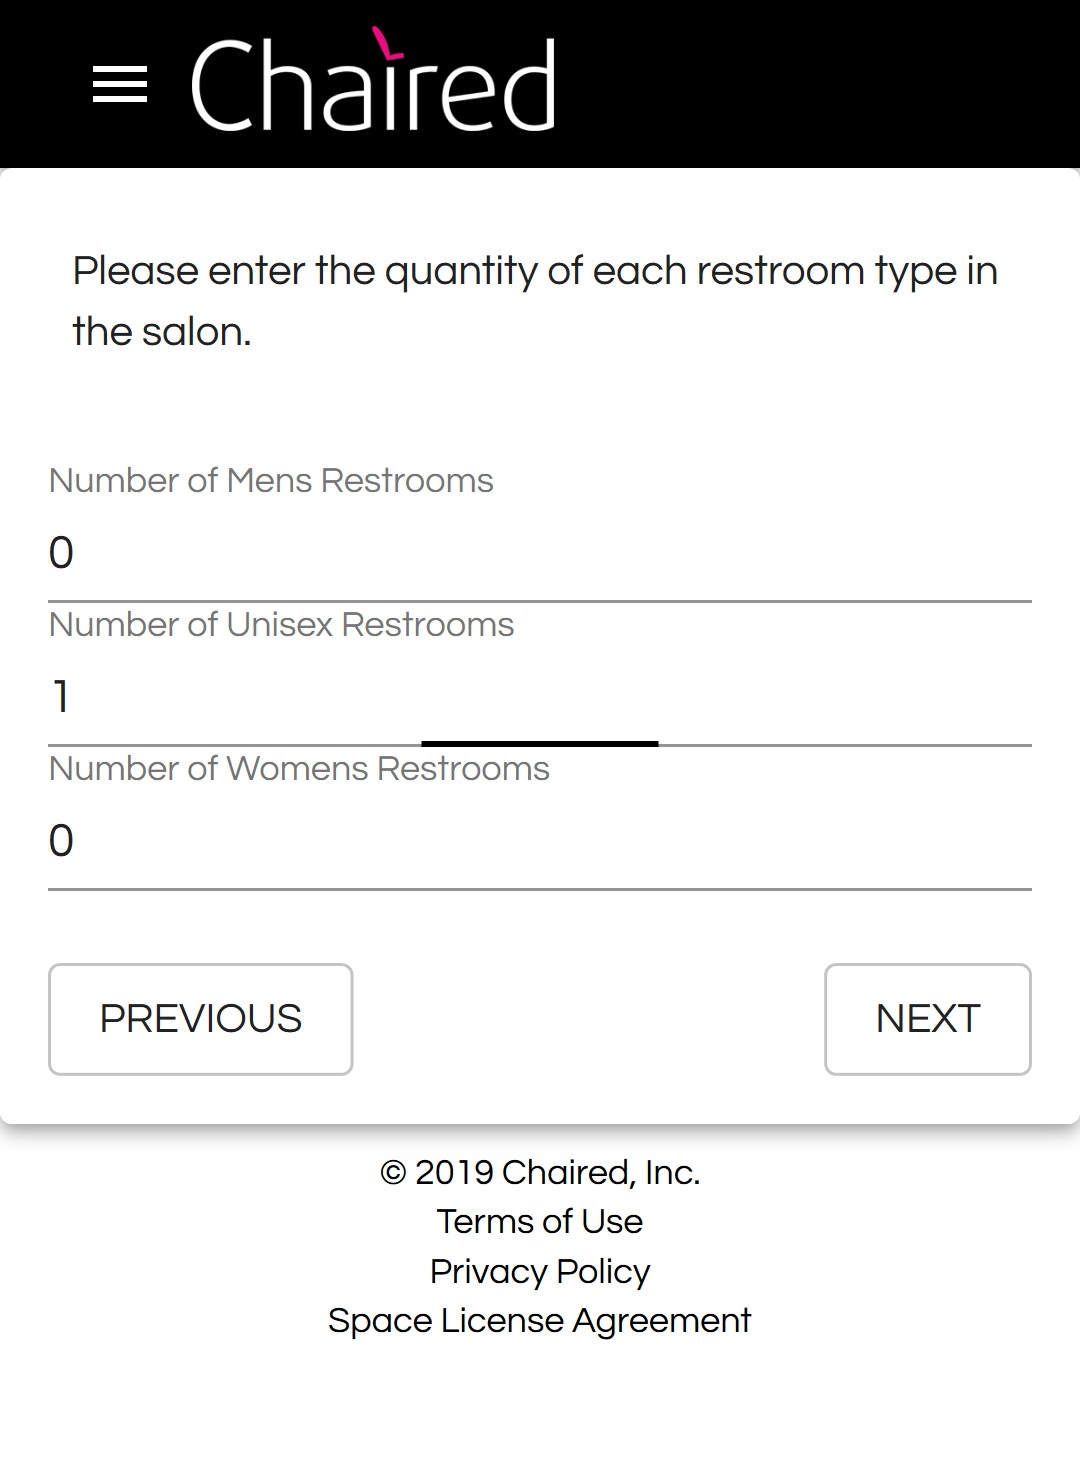
Step 14 - Restrooms
Let your Guests know how many restrooms your salon listing has available.
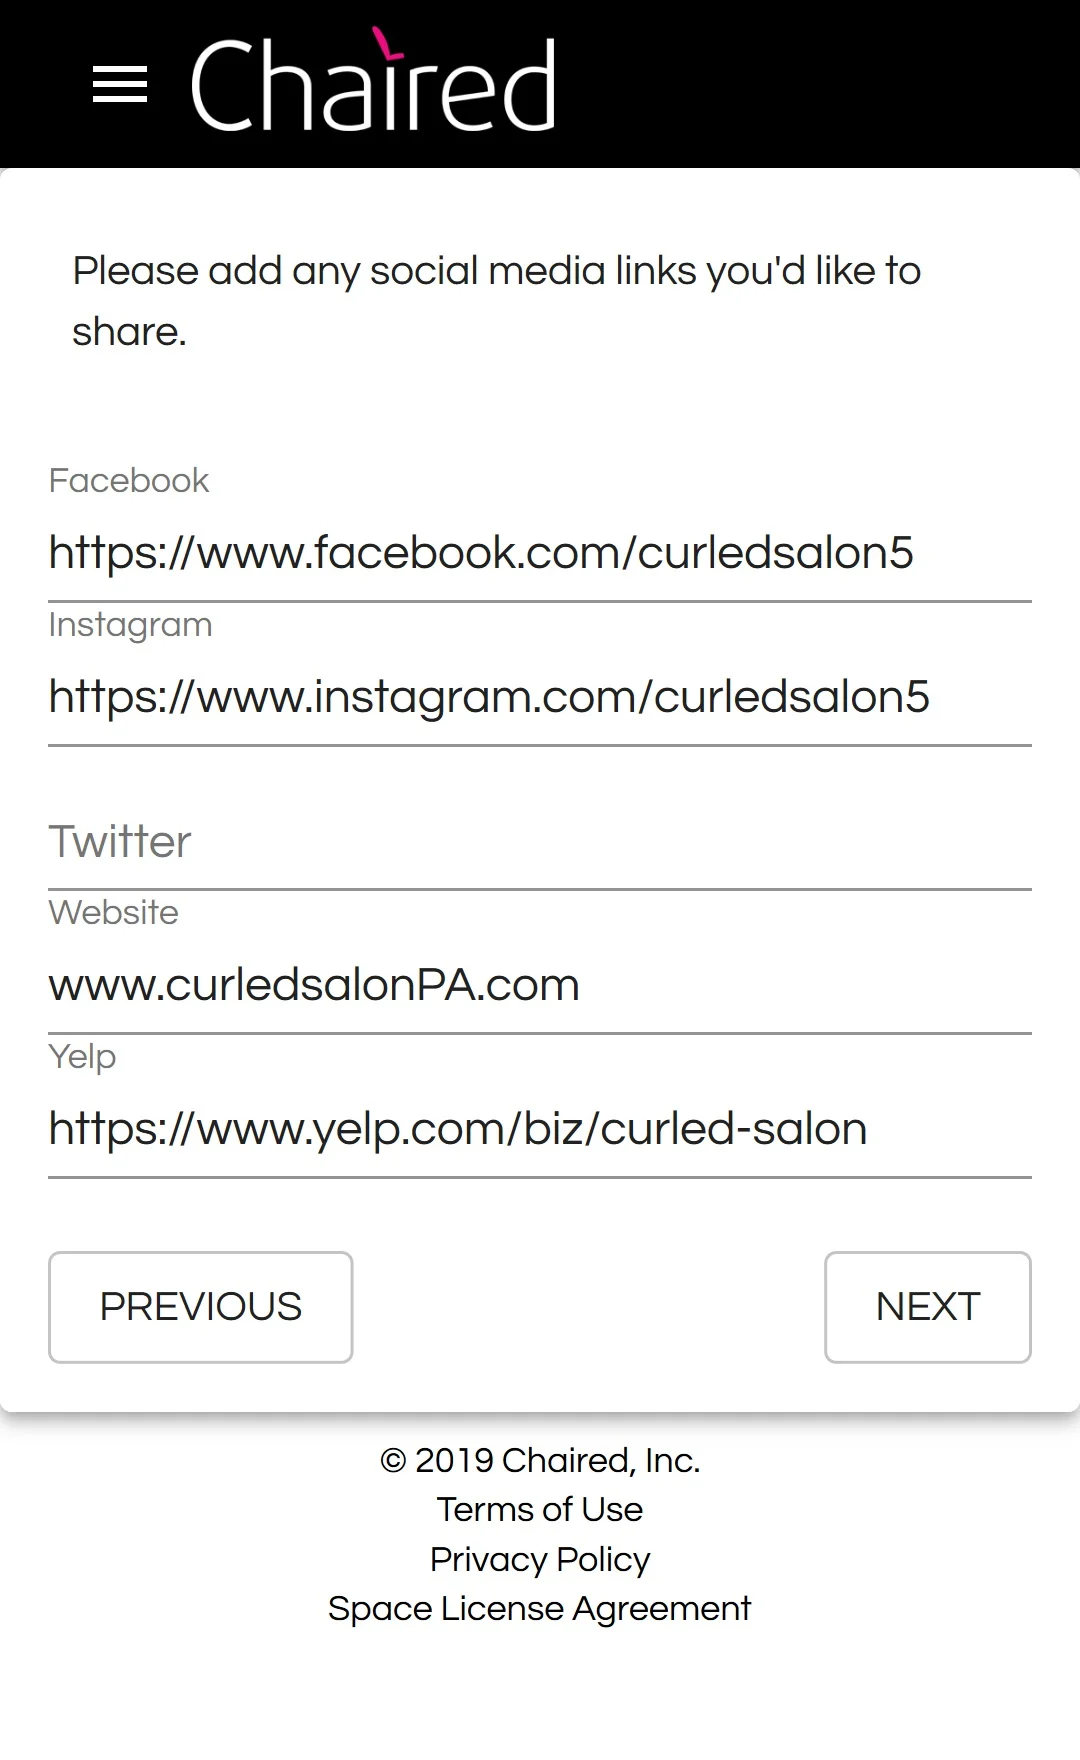
Step 15 - Social Media & Web Links (Final Listing Step)
Adding social media and website links is an important way to let your Guests learn more about your salon beyond the information provided in the listing. Adding this information increases your listing’s appeal to Guests and typically leads to greater booking demand. This information also helps reduce complaints and issues caused because a Guest made an assumption while lacking full knowledge.
Congratulations! This is the final step to create your listing. Once you hit “Next” your new listing will be submitted for review by the Chaired platform! It may take 24-48 hours for your new listing to show up live on the platform’s search results. A Chaired representative will contact you if any listing information appears missing or incorrect.
To suggest changes to the social media and website categories please email us at hello@getchaired.com or fill out the Contact Us form.
Important Note
When a listing is live on the platform, any open calendar date may be booked by a Guest - the platform does not allow Hosts to approve or deny a Guest booking request prior to booking confirmation. This is a feature our team is working to build and incorporate into the platform so stay tuned. When a guest books a reservation it will automatically book to your calendar and withdraw payment from the Guest.
If there are dates outside of the salon listing’s normal business hours where the listing will be unavailable to receive Guests, the Host should add Blocked Calendar Dates to the listing calendar. Guests are unable to book any dates you Block Out. Click here to read about adding and adjusting Blocked Dates.
Step 16 - Host Payouts Bank Deposit Information
Before you are able to receive payouts from Guests through the Chaired platform you’ll need to tell us where to deposit your income payments. Here’s how:
Go to www.getchaired.com
Click the hamburger menu on the top left of your screen
Click “Profile”
At the bottom of the page click “Connect to Stripe”
You’ll be taken to a Stripe.com page. Stripe is a secure payment provider so your payment information will be safe and sound! Learn more about Stripe on their website here.
Follow the instructions to add the bank account you wish to use for receiving deposits received from Guests.
After you setup your deposit account information you’ll be able to access a Payments Dashboard in the same location on your Profile page to see a recorded history of the payments you’ve earned and received on the Chaired platform.
Step 17 - Multiple Listings
You can create multiple listings, even if they are in the same salon location.
Each listing and each listing’s corresponding calendar should be created for a single and specific workspace. If you wish to list two or more workspaces on Chaired you should create a separate listing for each. While the salon address and contact information may be the same, make sure to use a different Listing Title for each listing. We suggest you also use a different listing picture to prevent Guest confusion. If you’ve already created one listing, you can create a second listing by following the same process as before.